
4-3. Coupler Hitch Assembly
e. Repair or Replacement. Repair or replace any
broken or badly worn parts.
a. Removal. Remove the coupler hitch assembly
as described in paragraph 3-4.
f. Reassembly. Reassemble the coupler hitch
assembly in the reverse order of disassembly.
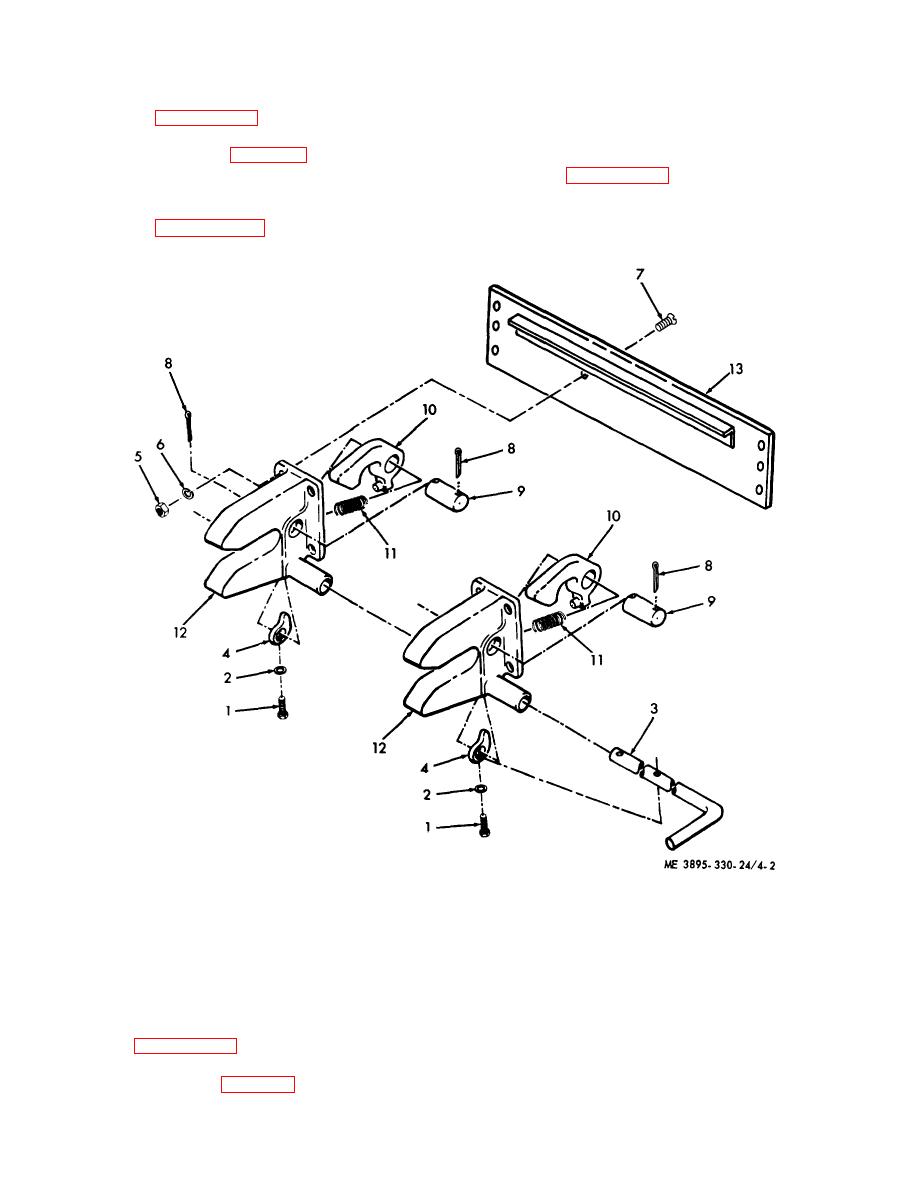
b. Disassembly. Disassemble the coupler hitch
assembly as illustrated in figure 4-2 c. Cleaning. Clean
g. Installation.
Install the coupler hitch as
all parts of the coupler hitch assembly in cleaning
described in paragraph 3-4.
solvent and dry thoroughly.
d. Inspection. Inspect the coupler hitch assembly
as described in paragraph 2-19.
1
Screw
5
Nut
9
Shaft
2
Flatwasher
6
Lockwasher
10
Dog
3
Lever
7
Bolt
11
Spring
4
Latch
8
Cotter pin
12
Housing
13
Bar assembly
Figure 4-2. Coupler hitch assembly.
4-4. Agitator
c. Cleaning.
Clean all parts of the agitator
assembly in cleaning solvent and dry thoroughly.
a. Removal. Remove the agitator assembly as
described in paragraph 3-5.
b. Disassembly.
Disassemble the agitator
assembly as illustrated in figure 4-3.
4-2

